Thursday, October 30, 2014

Good Intentions: A DIY Bathroom Vanity on a Very Serious Budget , Part 2

If you remember, we recently had a vanity catastrophe at our house. In case you missed it, you can read about it here

Before I take you on the next leg of our little journey to diy bathroom vanity hell (and back again, because it really is a beautiful ending), I think it's important you get to know my dad. 

My dad, Howard, is a bit of a Renaissance man. Among his many other skills (grilling, golfing, gardening, sailing, home repair, being a Grumpa to our Buggy Boy, and apparently bowling), he has also become quite the master woodworker. 

Here he is in his natural habitat: our barn turned workshop. 


Most recently, he has combined his love of sailing with his passion for woodworking and is building a 26 ft. sailboat from scratch in our barn (Ya know, like you do.) 

It is still in the beginning stages, but it's actually starting to look like a boat.


Incredible, no?

This tidbit of information is where our story picks back up. You see, this boat just happens to be built from plywood. Marine grade plywood. As in, waterproof, won't ever rot or mold, capable of withstanding an entire ocean without so much as a water spot kind of plywood. Perfect for a bathroom vanity where little hands will soon be learning to wash themselves/splash everything within a three mile radius. 

And we just happen to have several extra sheets of it sitting in our barn. Go figure.

Ordinarily this particular plywood costs $100/sheet. Fortunately, donating your barn to a very sympathetic, generous, handsome woodworker/boat builder (Am I selling this enough?) comes with some perks. We scored it for free. It doesn't get more budget friendly than that!


Before it's finished, the plywood looks like, well, plywood. However, once it's coated with epoxy and varnish (an important step in making it completely waterproof), it turns a deep, rich color. It's really kind of bizarre how different it looks. 

Once it was decided that the original vanity top was officially dead, Justin and my dad got to work on the new plywood top. They cut the sheet down to fit perfectly on the iron base, and then drilled the holes for the drain and faucet. They also cut a piece to go against the wall on top of the vanity and act as a backsplash.


The plywood has a beautiful natural grain to it, but the edges still look like plywood. So my dad picked up a couple extra walnut planks from my grandparents' farm. That's the walnut on the far right. Once the plywood is treated, the colors are almost identically. Crazy, right?


He ripped the boards down to create trim pieces to cover up the edges of the plywood. 


The vanity butts up against the wall, so we only needed trim pieces for the front and one side. 


Now comes the tricky part. In order to seal the plywood so it will be completely waterproof, it needs two coats of clear epoxy. It goes on like syrup and has to be carefully smoothed out. As it dries, little air bubbles pop up along the surface, but they get sanded out anyway.


This is what it looks like when the epoxy dries. The plywood is really shiny, almost like glass, which is fine if that's what you're into. It's not exactly the look I'm going for, though. Not to worry. Once it is sanded and varnished, it will look a lot different.


My parents are currently in Arizona while my dad is accepting an Appraiser of the Year Award, because of course he is. Unfortunately for us, that means our vanity is temporarily on the back burner, and we're stuck washing our hands at the kitchen sink for a few more days. First world problems.

Check back soon for the final installment of The DIY Budget Bathroom Vanity From Hell!

Monday, October 27, 2014

Good Intentions: A DIY Bathroom Vanity on a Very Serious Budget, Part 1

You know the saying about the road to hell being paved with good intentions? Well, that's where this little story begins...

We've been desperate to redo our downstairs powder room since we moved in. It sports the same orangey-oak cabinets as our kitchen, as well as the same (original) 35 year old carpet. In case you missed it, I just said CARPET. A little perspective: the people we bought our house from had boys. It's dis.gust.ing.  

But, the time has finally come. We've saved up enough money, we've invested in hazmat suits, and we're finally ready to tackle this sad little room. Good intentions, right? Yep. Stay with me.


A few months ago, I found this huge, beautiful antique vessel sink at a neighborhood antique fair. My sad, late night pictures really don't do her justice. She's glorious. And absolutely perfect for the powder room renovation we have planned. 

I especially love the production stamp on the front of the sink. I had a new vessel sink all picked out, but I think this adds so much more character. 


I also found this iron table base. It's the perfect size for our little downstairs powder room, and I knew instantly I had to have it for the vanity base.


The best part? I snagged both of them for under $50! All I needed was the perfect top for the base. Easy, right? Wrong. I looked and looked, but I couldn't find a piece that was just the right size with enough character to bring some charm to our little space. I wanted it to look like a piece of furniture, like it was custom made for the space.


I was getting a little hopeless. I even started to reconsider the base, and maybe just find a cute old table to use instead. I was just about to give up and rethink the entire room. And then the clouds parted, a choir of tiny angels began to sing, and a gleaming ray of sunshine burst through the heavens,  pointing me in exactly the right direction.

Enter this beauty: an antique walnut desk I spotted buried under mounds of linens and knick-knacks at a local antique store. It was calling out to me: Pick me! Pick me! At $80, it was more than I wanted to spend for a vanity top (No, seriously, we're on a very tight budget), but I just couldn't pass it up.


It's the perfect size, and exactly the rich, dark color I wanted to warm up the white beadboard walls and hexagon tile. Isn't it beautiful? Isn't it perfect? Doesn't it make you want to go running through the Swiss Alps belting out "The hills are aliiiiiiive..."

Wait. What's that you say? What's that little gray spot on the side? That odd blemish that's so perfectly placed right on the edge so that it could never be covered up by a conveniently placed hand towel or interesting display of soaps? Yep, that's the one.


Ah, yes. That would be the first step on our little journey to DIY bathroom vanity hell. That's the spot where one very sweet, well-meaning husband who shall remain nameless was in a hurry to disconnect the tabletop from the base and quickly cut the hole for the drain before the plumber arrived to install the sink.


One false move with the jigsaw, and the angels packed up their choir robes, quickly patched up that pesky part in the clouds, and wished us luck. Feeling awful and desperate to cover up the small blemish he made with the jigsaw, my poor hubby sanded the whole spot, and tried frantically to restain it. Unfortunately, this little beauty is made with wood veneer. This fix would require completely sanding down the entire top and restaining the whole thing. I may try it someday when I have a chance, but we're mid-renovation with full time jobs and a toddler. Ain't nobody got time for that!


Not to worry, though. This little story comes complete with a happy ending. I (or possibly my dad, who knows for sure?) came up with an absolutely brilliant solution. I'm really excited to share this one; I think you're going to love it! I'll have the next chapter in our little saga posted soon. Stop back by and check it out!

Wednesday, October 22, 2014

Our little Bug's nursery

When we found out we were having a baby boy, I knew I wanted a room he could grow into. I wanted to keep it clean, simple and uncluttered. So, I decided to go with a vintage "gentleman of the world" theme.


Behind the crib, we hung a vintage pull-down map of the Western hemisphere. Adorable, no? And then he learned to stand/destroy everything within arms reach when he's supposed to be napping. Lesson learned.   


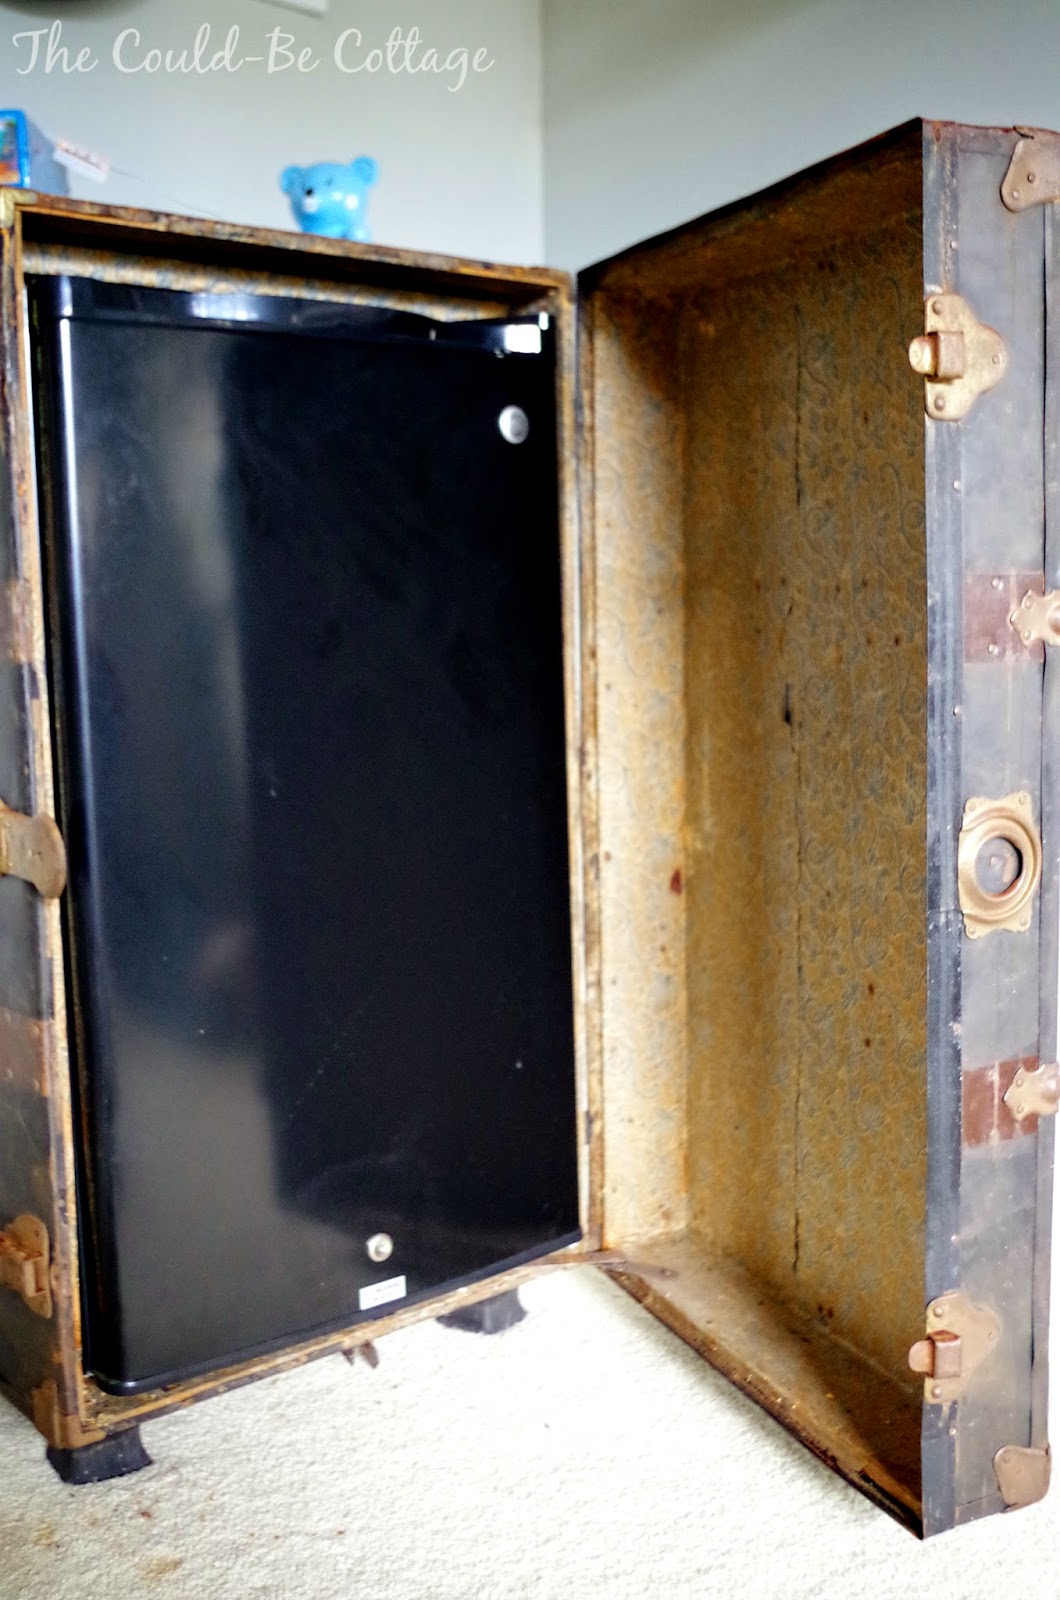
See that antique steamer trunk in the corner? It has a secret. Inside is a very unfortunate looking mini-fridge that we use to store bottles for Buggy Boy's middle of the night milk cravings (although there may or may not be a string cheese or two hiding in there for Momma. No judging.)


Those baby Nikes used to belong to Justin. I love that his mom kept them all these years and very graciously gave them to us when we found out we were expecting. I couldn't resist finding a spot for them in Buggy Boy's room.


 I made the pinwheel mobile out of scrapbook paper and an embroidery hoop.


Justin built a long cubby shelf to fit perfectly under the window and house all of Buggy Boy's unruly toys, puzzles and blankets. 


We hung vinyl gutters along the wall next to the glider to house our massive collection of books (This is only about half of them. We have to rotate them with the seasons. Hello, my name is Katie, and I am addicted to books).

  My grandfather built the wooden rocking horse for my brother and me when we were babies.


This is my favorite part of Buggy Boy's room. I found the wire display rack and basket at a flea market in town, and they added some much needed clothing storage. One holds often used items, like socks, pajamas (or jammie jams at our house), and sleep sacks, while the other functions as a hamper. I also found wire baskets at a local antique store and use them to store diapers and wipes. We hung them from a peg board painted with chalkboard paint to keep the clutter contained and away from curious hands.


The baby sized paddy caps we acquired before we even started trying to have a baby, because really, who doesn't need a collection of tiny jaunty hats in their life?


Here's hoping you have a day that is wild and free!


Saturday, October 18, 2014

Welcome to our home. Please come in...


Our entryway is fairly large, but it's pretty long and narrow. We chose this spot to display our family photo gallery wall as a conversation piece when visitors first enter our home. To keep it from becoming too busy, I try to keep the seasonal decor fairly simple.


A few gourds here, a pumpkin or two there.


This buffet was gifted to us by some dear friends who inherited it when a family member passed away. It wasn't their style, but they didn't want to sell it, so they generously passed it on to us. Now, it serves as our mail sorting station/dining room linen storage and helps to contain one small peak of the mountains of clutter we seem to accumulate. 


Our gallery wall is a collection of family photos, art and architectural salvage. If you look closely, you can spot the bizarre light switch that controls roughly 3/4 of the lights in the house, as well as an indefinite number of outlets throughout the first floor for no apparent reason. (Fun fact: When we were buying our house and had it inspected, our home inspector said he'd never seen anything like our electrical system in his 25 years of experience. Awesome.) You can't find plate covers for our light switches anymore, but I'm working on a solution. Stay tuned for that one...


 I love adding a natural pop of color, and I actually think a branch of bold autumn leaves is more beautiful than fresh flowers. Especially when displayed in a well-loved pair of wellies.

 Thanks for stopping by!